
Keep your site running at its best
Updates are simple and safe — your settings stay intact throughout. Follow the steps below to manually update any plugin or theme from your account.
Auto-updates are on their way. We’re building our own Auto-Updater plugin — soon you’ll update everything directly from your WordPress dashboard, no manual steps needed. Follow along at Notices.
Manually updating a plugin or theme
Download the new version, upload it to WordPress, confirm, and replace. Your settings stay intact.
- Back up your site — always a good safety net in case something unexpected happens.
- Use staging for bigger changes — for mission-critical sites, test updates on a staging environment first.
Need a quick staging site? Spin up a temporary WordPress install with InstaWP and test updates there before touching your live site.
-
1
Download the updated file
Go to My Account → Downloads, or directly from the product page, and download the latest version (a
.zipfile). Confirm it’s the new version by its version number. -
2
Upload it in WordPress
From your dashboard: Plugins → Add New Plugin → Upload Plugin → Choose File. Select the
.zipand click Install Now.
For themes: Appearance → Themes → Add New → Upload Theme. -
3
Confirm the version
WordPress will detect the existing plugin or theme and show both the current version and the new version so you can verify you’re installing the correct release.
-
4
Replace the existing version
Click “Replace current with uploaded.” WordPress swaps the files and keeps all your settings, configuration, and data exactly as they were.
After the update, your plugin or theme stays configured exactly as before, but now benefits from the latest features, fixes, and security improvements.
Double-zipped files: Some products (especially from Themeforest/Codecanyon) come with a zip inside a zip. If you see an error like “The package could not be installed. The theme is missing the style.css stylesheet.” — unzip the outer file first and install the inner .zip.
Manual update in 4 steps
- Download the latest version from your account.
- Upload the
.zipin WordPress. - Confirm current vs. new version number.
- Click “Replace current with uploaded.”
Recommended: back up your site first, or test on staging before updating your live site.
Requesting a file update
If a file is behind the latest vendor version, report it directly from the product page and we’ll get it updated.
Click “Report — Some issue?”
Find the Report button in the product info bar at the top of the product page and click it to open the report popup.
Select the issue type
In the Any issue? dropdown, select “A new version is available.” A confirmation message will appear.
Enter the expected version
Type the version number you’re expecting in the Expected Version field, then click Send Report.
Download the new version
Once the update appears in Latest Updates, download it: members go directly to the product page; individual purchases go to My Account → Downloads.
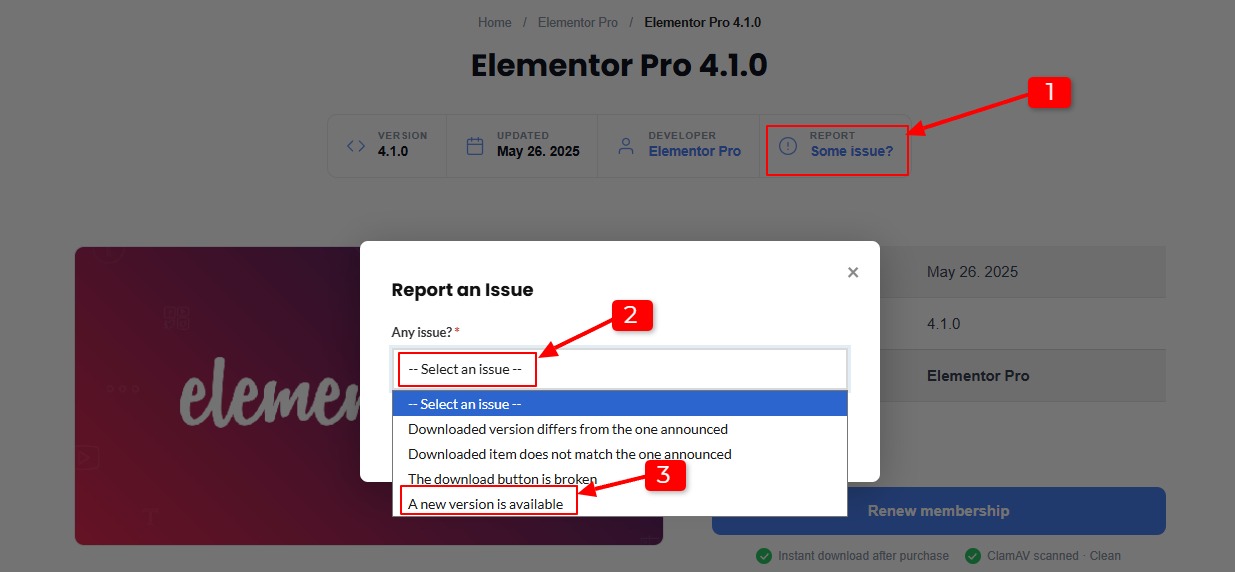
Click “Report — Some issue?” on the product page, select “A new version is available,” enter the version number, and send your report.